步骤1:
一、效果
二、HTML
[html]
<table border="0" cellspacing="0" cellpadding="0">
<tr bgcolor="#220103">
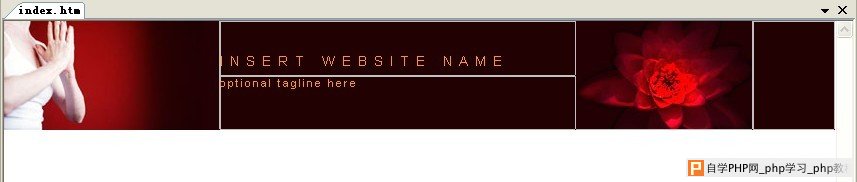
<td width="215" rowspan="2" colspan="2"><img src="mm_spa_photo1.jpg" alt="Header image" width="215" height="108" border="0" /></td>
<td width="355" colspan="2" height="54" nowrap="nowrap" id="logo" valign="bottom">INSERT WEBSITE NAME</td>
<td width="176" rowspan="2"><img src="mm_spa_photo2.jpg" alt="header image 2" width="176" height="108" border="0" /></td>
<td width="100%" rowspan="2"> </td>
</tr>
<tr bgcolor="#220103">
<td height="54" colspan="2" nowrap="nowrap" id="tagline" valign="top">optional tagline here</td>
</tr>
</table>
<table border="0" cellspacing="0" cellpadding="0">
<tr bgcolor="#220103">
<td width="215" rowspan="2" colspan="2"><img src="mm_spa_photo1.jpg" alt="Header image" width="215" height="108" border="0" /></td>
<td width="355" colspan="2" height="54" nowrap="nowrap" id="logo" valign="bottom">INSERT WEBSITE NAME</td>
<td width="176" rowspan="2"><img src="mm_spa_photo2.jpg" alt="header image 2" width="176" height="108" border="0" /></td>
<td width="100%" rowspan="2"> </td>
</tr>
<tr bgcolor="#220103">
<td height="54" colspan="2" nowrap="nowrap" id="tagline" valign="top">optional tagline here</td>
</tr>
</table>
三、CSS
[css]
/* Global Styles */
body {
margin:0px;
}
#logo {
font:14px Arial, Helvetica, sans-serif;
color: #FF9900;
letter-spacing:.5em;
line-height:30px;
}
#tagline {
font:11px Arial, Helvetica, sans-serif;
color: #FF9900;
letter-spacing:.2em;
line-height:14px;
}
/* Global Styles */
body {
margin:0px;
}
#logo {
font:14px Arial, Helvetica, sans-serif;
color: #FF9900;
letter-spacing:.5em;
line-height:30px;
}
#tagline {
font:11px Arial, Helvetica, sans-serif;
color: #FF9900;
letter-spacing:.2em;
line-height:14px;
}
四、知识点:
(一)<td> 标签的 nowrap 属性 :
规定表格单元格中的内容不换行,属性行为与很多参考资料提的table、td的width属性无关。
(二)em:
em指字体高,任意浏览器的默认字体高都是16px。所以未经调整的浏览器都符合: 1em=16px。那么12px=0.75em, 10px=0.625em。为了简化font-size的换算,需要在css中的body选择器中声明Font-size=62.5%,这就使em值变为 16px*62.5%=10px, 这样12px=1.2em, 10px=1em, 也就是说只需要将你的原来的px数值除以10,然后换上em作为单位就行了。em有如下特点:
1. em的值并不是固定的;
2. em会继承父级元素的字体大小。
五、技术要点:
1、表格总宽度不固定,具体宽度由第4个单元格100%的设置补充,整个宽度充满屏幕;
2、页边距在样式表中由标签body设置;
3、字体在样式表中由标签#logo、#tagline设置;
4、布局表格属性在网页中设置<table border="0" cellspacing="0" cellpadding="0">;
5、单元格中插入图片时,单元格的宽度应该由图片宽度决定,两个图片高度应该一致。
步骤2:
一、效果:

二、HTML
[html]
<tr bgcolor="#FF9900">
<td colspan="6"><img src="mm_spacer.gif" alt="" width="1" height="1" border="0" /></td>
</tr>
<tr bgcolor="#FF080E">
<td colspan="6" style="height: 2px"><img src="mm_spacer.gif" alt="" width="1" height="2" border="0" /></td>
</tr>
<tr bgcolor="#FF9900">
<td colspan="6" style="height: 1px"><img src="mm_spacer.gif" alt="" width="1" height="1" border="0" /></td>
</tr>
<tr bgcolor="#FF080E">
<td colspan="6" style="height: 18px"><img src="mm_spacer.gif" alt="" width="1" height="18" border="0" /></td>
</tr>
<tr bgcolor="#FF9900">
<td colspan="6" style="height: 1px"><img src="mm_spacer.gif" alt="" width="1" height="1" border="0" /></td>
</tr>
<tr bgcolor="#FF080E">
<td colspan="6" style="height: 2px"><img src="mm_spacer.gif" alt="" width="1" height="2" border="0" /></td>
</tr>
<tr bgcolor="#FF9900">
<td colspan="6"><img src="mm_spacer.gif" alt="" width="1" height="1" border="0" /></td>
</tr>
<tr bgcolor="#FF9900">
<td colspan="6"><img src="mm_spacer.gif" alt="" width="1" height="1" border="0" /></td>
</tr>
<tr bgcolor="#FF080E">
<td colspan="6" style="height: 2px"><img src="mm_spacer.gif" alt="" width="1" height="2" border="0" /></td>
</tr>
<tr bgcolor="#FF9900">
<td colspan="6" style="height: 1px"><img src="mm_spacer.gif" alt="" width="1" height="1" border="0" /></td>
</tr>
<tr bgcolor="#FF080E">
<td colspan="6" style="height: 18px"><img src="mm_spacer.gif" alt="" width="1" height="18" border="0" /></td>
</tr>
<tr bgcolor="#FF9900">
<td colspan="6" style="height: 1px"><img src="mm_spacer.gif" alt="" width="1" height="1" border="0" /></td>
</tr>
<tr bgcolor="#FF080E">
<td colspan="6" style="height: 2px"><img src="mm_spacer.gif" alt="" width="1" height="2" border="0" /></td>
</tr>
<tr bgcolor="#FF9900">
<td colspan="6"><img src="mm_spacer.gif" alt="" width="1" height="1" border="0" /></td>
</tr>
三、CSS
无对应的样式
四、要点
七条红黄相间的线而已,每行中插入的是一个像毒宽高,颜色透明的图片mm_spacer.gif
步骤3:
一、效果

二、HTML
[html]
<tr>
<td width="165" valign="top" id="navborder"><br />
<table border="0" cellspacing="0" cellpadding="0" width="160" id="navigation">
<tr>
<td width="160"><a href="javascript:;" class="navText">ABOUT US</a></td>
</tr>
<tr>
<td width="160"><a href="javascript:;" class="navText">THE SPA</a></td>
</tr>
<tr>
<td width="160"><a href="javascript:;" class="navText">TREATMENTS</a></td>
</tr>
<tr>
<td width="160"><a href="javascript:;" class="navText">CLASSES</a></td>
</tr>
<tr>
<td width="160"><a href="javascript:;" class="navText">CONTACT</a></td>
</tr>
</table>
</td>
</tr>
<tr>
<td width="165" valign="top" id="navborder"><br />
<table border="0" cellspacing="0" cellpadding="0" width="160" id="navigation">
<tr>
<td width="160"><a href="javascript:;" class="navText">ABOUT US</a></td>
</tr>
<tr>
<td width="160"><a href="javascript:;" class="navText">THE SPA</a></td>
</tr>
<tr>
<td width="160"><a href="javascript:;" class="navText">TREATMENTS</a></td>
</tr>
<tr>
<td width="160"><a href="javascript:;" class="navText">CLASSES</a></td>
</tr>
<tr>
<td width="160"><a href="javascript:;" class="navText">CONTACT</a></td>
</tr>
</table>
</td>
</tr>
三、CSS
[css]
#navigation td {
border-bottom: 1px solid #FF9900
}
#navigation a {
font:11px Arial, Helvetica, sans-serif;
color: #FF9900;
line-height:16px;
letter-spacing:.1em;
text-decoration: none;
display:block;
padding:8px 6px 8px 22px;
}
#navigation a:hover {
color:#FFFFCC;
font-weight:bold;
background: url("mm_bullet_yellow.gif") 10px 50% no-repeat;
}
.navText {
font:11px Georgia, Times New Roman, Times, serif;
color: #1F2669;
line-height:16px;
letter-spacing:.1em;
text-decoration: none;
}
四、要点:
1、背景在<body>标签中设置<body bgcolor="#990000" background="mm_bg_red.gif">,背景线图片mm_bg_red.gif;
2、navborder、#navheader??
步骤4:
一、效果
二、HTML
[html] <td width="50"><img src="mm_spacer.gif" alt="" width="50" height="1" border="0" /></td>
<td width="305" valign="top"><img src="mm_spacer.gif" alt="" width="305" height="1" border="0" /><br />
<br />
<br />
<table border="0" cellspacing="0" cellpadding="0" width="305">
<tr>
<td class="pageName">WELCOME MESSAGE</td>
</tr>
<tr>
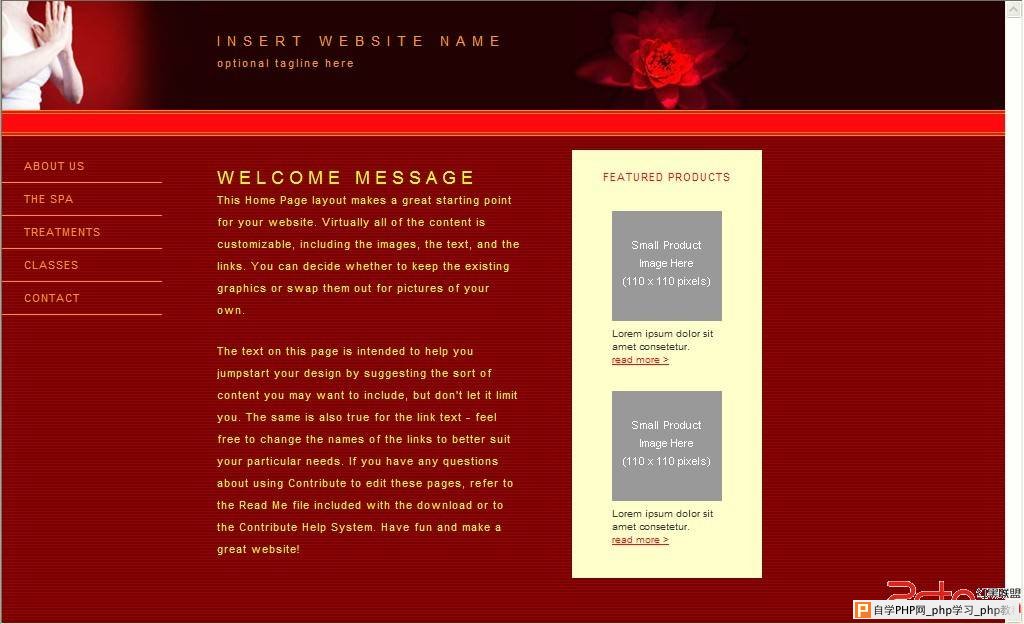
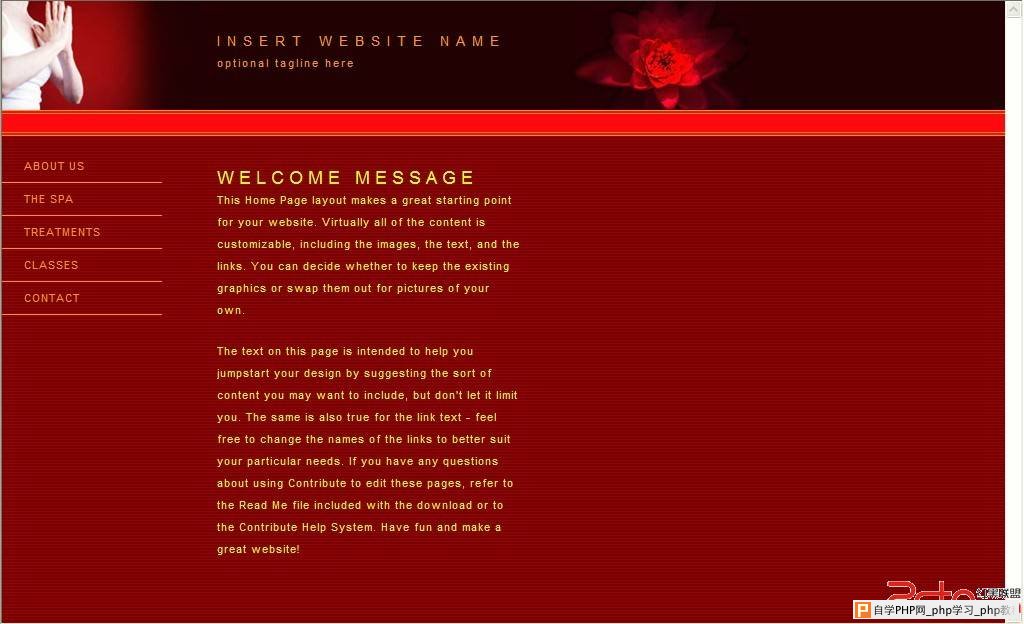
<td class="bodyText"><p>This Home Page layout makes a great starting point for your website. Virtually all of the content is customizable, including the images, the text, and the links. You can decide whether to keep the existing graphics or swap them out for pictures of your own.</p>
<p>The text on this page is intended to help you jumpstart your design by suggesting the sort of content you may want to include, but don't let it limit you. The same is also true for the link text - feel free to change the names of the links to better suit your particular needs. If you have any questions about using Contribute to edit these pages, refer to the Read Me file included with the download or to the Contribute Help System. Have fun and make a great website!</p> </td>
</tr>
</table>
聽<br />
<br /> </td>
<td width="50"><img src="mm_spacer.gif" alt="" width="50" height="1" border="0" /></td>
<td width="50"><img src="mm_spacer.gif" alt="" width="50" height="1" border="0" /></td>
<td width="305" valign="top"><img src="mm_spacer.gif" alt="" width="305" height="1" border="0" /><br />
<br />
<br />
<table border="0" cellspacing="0" cellpadding="0" width="305">
<tr>
<td class="pageName">WELCOME MESSAGE</td>
</tr>
<tr>
<td class="bodyText"><p>This Home Page layout makes a great starting point for your website. Virtually all of the content is customizable, including the images, the text, and the links. You can decide whether to keep the existing graphics or swap them out for pictures of your own.</p>
<p>The text on this page is intended to help you jumpstart your design by suggesting the sort of content you may want to include, but don't let it limit you. The same is also true for the link text - feel free to change the names of the links to better suit your particular needs. If you have any questions about using Contribute to edit these pages, refer to the Read Me file included with the download or to the Contribute Help System. Have fun and make a great website!</p> </td>
</tr>
</table>
聽<br />
<br /> </td>
<td width="50"><img src="mm_spacer.gif" alt="" width="50" height="1" border="0" /></td>
三、CSS
步骤5: