来源:自学PHP网 时间:2015-04-14 12:58 作者: 阅读:次
[导读] 跟着慕课网的教学视频学习了如何制作微信的主界面,因为还有一些地方并没有完全搞懂,所以这里主要是记录下整个制作的过程,方便以后的学习!效果图如图所示:实现了点击下面...
|
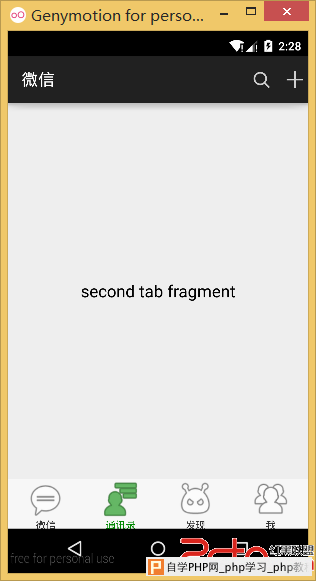
跟着慕课网的教学视频学习了如何制作微信的主界面,因为还有一些地方并没有完全搞懂,所以这里主要是记录下整个制作的过程,方便以后的学习! 效果图如图所示:
实现了点击下面tab切换fragment以及滑动切换tab的功能,同时滑动时,下面tab的icon会实现颜色渐变的效果。 首先是主界面的布局:
<LinearLayout xmlns:android="http://schemas.android.com/apk/res/android"
    xmlns:bunschen="http://schemas.android.com/apk/res-auto"
    android:layout_width="match_parent"
    android:layout_height="match_parent"
    android:orientation="vertical">

    <android.support.v4.view.ViewPager
        android:id="@+id/viewPager"
        android:layout_width="match_parent"
        android:layout_height="0dp"
        android:layout_weight="1" />

    <LinearLayout
        android:layout_width="match_parent"
        android:layout_height="60dp"
        android:background="@drawable/tab_bg"
        android:orientation="horizontal">

        <com.chen.weixin_6_0.ChangeIconColorWithText
            android:id="@+id/tab_indicator_one"
            android:layout_width="0dp"
            android:layout_height="match_parent"
            android:layout_weight="1"
            bunschen:Icon="@drawable/ic_menu_start_conversation"
            bunschen:color="#FF008901"
            bunschen:text="@string/app_name"
            bunschen:text_size="12sp"/>

        <com.chen.weixin_6_0.ChangeIconColorWithText
            android:id="@+id/tab_indicator_two"
            android:layout_width="0dp"
            android:layout_height="match_parent"
            android:layout_weight="1"
            bunschen:Icon="@drawable/ic_menu_friendslist"
            bunschen:color="#FF008901"
            bunschen:text="@string/tab_contact"
            bunschen:text_size="12sp"/>

        <com.chen.weixin_6_0.ChangeIconColorWithText
            android:id="@+id/tab_indicator_three"
            android:layout_width="0dp"
            android:layout_weight="1"
            android:layout_height="match_parent"
            bunschen:Icon="@drawable/ic_menu_emoticons"
            bunschen:color="#FF008901"
            bunschen:text="@string/tab_find"
            bunschen:text_size="12sp"/>

        <com.chen.weixin_6_0.ChangeIconColorWithText
            android:id="@+id/tab_indicator_four"
            android:layout_width="0dp"
            android:layout_height="match_parent"
            android:layout_weight="1"
            bunschen:Icon="@drawable/ic_menu_allfriends"
            bunschen:color="#FF008901"
            bunschen:text="@string/tab_me"
            bunschen:text_size="12sp"/>

    </LinearLayout>

</LinearLayout>
主界面采用线型布局,上面是自定义的ActionBar,中间内容区域是ViewPager+Fragment,下面的Tab区域是一个横向线型布局,其中每个View都是通过自定义布局实现。 1.自定义ActionBar:
//是更多菜单按钮显示出来
private void setOverflowShowingAlways() {
try {
  ViewConfiguration config = ViewConfiguration.get(this);
  Field menuKeyField = ViewConfiguration.class.getDeclaredField("sHasPermanentMenuKey");
  menuKeyField.setAccessible(true);
  menuKeyField.setBoolean(config, false);
  } catch (Exception e) {
    e.printStackTrace();
  }
}
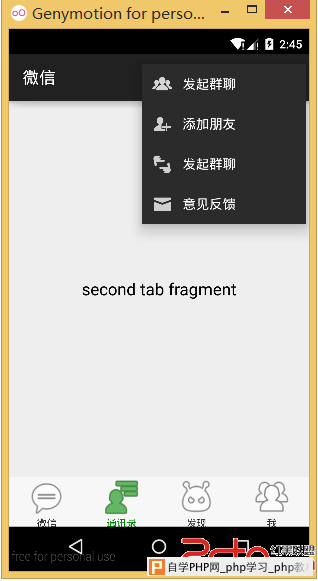
该段是通过反射机制,将OverflowButton显示出来,因为在有菜单实体按键的手机中,屏幕中的菜单选项不会显示出来。
//是更多菜单按钮显示出来
private void setOverflowShowingAlways() {
try {
  ViewConfiguration config = ViewConfiguration.get(this);
  Field menuKeyField = ViewConfiguration.class.getDeclaredField("sHasPermanentMenuKey");
  menuKeyField.setAccessible(true);
  menuKeyField.setBoolean(config, false);
  } catch (Exception e) {
    e.printStackTrace();
  }
}
这段也是通过反射机制将Overflow菜单展开的菜单选项中将图标也显示出来,因为默认是将Overflow菜单展开的菜单选项的突变隐藏掉的。 菜单布局:
  <menu xmlns:android="http://schemas.android.com/apk/res/android">
      <item
          android:id="@+id/action_settings"
          android:actionViewClass="android.widget.SearchView"
          android:icon="@drawable/actionbar_search_icon"
          android:showAsAction="ifRoom|collapseActionView"
          android:title="@string/action_search"
          />

     <item
         android:id="@+id/menu_contact"
         android:icon="@drawable/menu_group_chat_icon"
         android:title="@string/menu_contact"/>

     <item
         android:id="@+id/menu_add_friend"
         android:icon="@drawable/menu_add_icon"
         android:title="@string/menu_add_friend"/>

     <item
         android:id="@+id/menu_scan"
         android:icon="@drawable/men_scan_icon"
         android:title="@string/menu_contact"/>

     <item
         android:id="@+id/menu_feedback"
         android:icon="@drawable/menu_feedback_icon"
         android:title="@string/menu_feedback"/>

 </menu>
接下来最主要的就是自定义View 首先是定义自定义的View需要的一些属性 values/attrs.xml:
  <?xml version="1.0" encoding="utf-8"?>
  <resources>

      <attr name="Icon" format="reference"></attr>
      <attr name="color" format="color"></attr>
      <attr name="text" format="string"></attr>
      <attr name="text_size" format="dimension"></attr>

      <declare-styleable name="ChangeIconColorWithText">
         <attr name="Icon"></attr>
         <attr name="color"></attr>
         <attr name="text"></attr>
         <attr name="text_size"></attr>
     </declare-styleable>
 </resources>
然后是在布局文件中使用:
 <com.chen.weixin_6_0.ChangeIconColorWithText
             android:id="@+id/tab_indicator_one"
             android:layout_width="0dp"
             android:layout_height="match_parent"
             android:layout_weight="1"
             bunschen:Icon="@drawable/ic_menu_start_conversation"
             bunschen:color="#FF008901"
             bunschen:text="@string/app_name"
             bunschen:text_size="12sp"/>
注意这里的自定义的命名空间:
bunschen:Icon="@drawable/ic_menu_start_conversation"
<LinearLayout xmlns:android="http://schemas.android.com/apk/res/android"
    xmlns:bunschen="http://schemas.android.com/apk/res-auto"
    android:layout_width="match_parent"
    android:layout_height="match_parent"
    android:orientation="vertical">
这里在开头自定义了命名空间,所以可以使用自定义的属性。 然后就是在构造函数中获取View:
   public class ChangeIconColorWithText extends View {

       private int mColor = 0xFF008901;
       private Bitmap mIconBitmap;
       private String mText = "微信";
       private int mTextSize = (int) TypedValue.applyDimension(TypedValue.COMPLEX_UNIT_SP,
               12, getResources().getDisplayMetrics());

       private Bitmap mBitmap;
      private Canvas mCanvas;
      private Paint mPaint;
      private float alpha;
      private Rect mTextBounds;
      private Rect mBitmapBounds;
      private Paint textPaint;

      private final static String INSTANCE_STATUS = "instance_status";
      private final static String ALPHA_STATUS = "alpha_status";

      public ChangeIconColorWithText(Context context) {
          this(context, null);
      }

      public ChangeIconColorWithText(Context context, AttributeSet attrs) {
          this(context, attrs, 0);
      }

      public ChangeIconColorWithText(Context context, AttributeSet attrs, int defStyleAttr) {
          super(context, attrs, defStyleAttr);
          //获取到布局文件中定义的自定义控件的属性
          TypedArray typedArray = context.obtainStyledAttributes(attrs, R.styleable.ChangeIconColorWithText);
          int n = typedArray.getIndexCount();
          //将这些属性赋值给该控件的成员变量
          for (int i = 0; i < n; i++) {
              int attr = typedArray.getIndex(i);
              switch (attr) {
                  case R.styleable.ChangeIconColorWithText_color:
                      mColor = typedArray.getColor(attr, 0xFF0E4010);
                     break;
                  case R.styleable.ChangeIconColorWithText_Icon:
                      BitmapDrawable drawable = (BitmapDrawable) typedArray.getDrawable(attr);
                     mIconBitmap = drawable.getBitmap();
                      break;
                  case R.styleable.ChangeIconColorWithText_text:
                      mText = typedArray.getString(attr);
                      break;
                 case R.styleable.ChangeIconColorWithText_text_size:
                      mTextSize = (int) typedArray.getDimension(attr, TypedValue.applyDimension(TypedValue.COMPLEX_UNIT_SP,
                              12, getResources().getDisplayMetrics()));
                      break;
              }
          }
          //回收掉使用的资源
          typedArray.recycle();

          mTextBounds = new Rect();
          textPaint = new Paint();
          textPaint.setTextSize(mTextSize);
          textPaint.setColor(0xff555555);
          textPaint.getTextBounds(mText, 0, mText.length(), mTextBounds);
      }

      @Override
      protected void onMeasure(int widthMeasureSpec, int heightMeasureSpec) {
          super.onMeasure(widthMeasureSpec, heightMeasureSpec);
          //测量图标的宽度,长度与宽度一致
          int iconWidth = Math.min(getMeasuredWidth() - getPaddingLeft() - getPaddingRight(),
                  getMeasuredHeight() - getPaddingBottom() - getPaddingTop() - mTextBounds.height());
          //测量图标绘制的位置的上下左右的值
        int left = (getMeasuredWidth() - iconWidth)/2;
          int top = (getMeasuredHeight() - mTextBounds.height() - iconWidth)/2;
          //确定icon绘制的边界
          mBitmapBounds = new Rect(left,top,left+iconWidth,top+iconWidth);
      }

      @Override
      protected void onDraw(Canvas canvas) {
          super.onDraw(canvas);
          //绘制出原无颜色的图标
          canvas.drawBitmap(mIconBitmap,null,mBitmapBounds,null);
          //ceil() 方法执行的是向上取整计算,它返回的是大于或等于函数参数,并且与之最接近的整数
          int Alpha = (int) Math.ceil(255 * alpha);
          // 内存去准备mBitmap , setAlpha , 纯色 ,xfermode , 图标
          setupTargetBitmap(Alpha);
          //1.绘制原文本。
          setupSourceText(canvas,Alpha);
          //2.绘制变色文本
          setupTargetText(canvas,Alpha);
          //将内存中绘制出的Bitmap对象绘制出来
          canvas.drawBitmap(mBitmap,0,0,null);
      }
      //绘制带颜色的文本
      private void setupTargetText(Canvas canvas, int alpha) {
          textPaint.setColor(mColor);
          textPaint.setAlpha(alpha);
          //计算文本绘制的位置
          float x = (getMeasuredWidth() - mTextBounds.width())/2;
          float y = (mBitmapBounds.bottom + mTextBounds.height());
          canvas.drawText(mText,x,y,textPaint);
     }
     //绘制原文本
     private void setupSourceText(Canvas canvas, int alpha) {
         textPaint.setAlpha(255 - alpha);
         textPaint.setColor(0xff333333);
         float x = (getMeasuredWidth() - mTextBounds.width())/2;
         float y = (mBitmapBounds.bottom + mTextBounds.height());
         canvas.drawText(mText,x,y,textPaint);
     }
     //在内存中绘制出icon
     private void setupTargetBitmap(int alpha) {
         mBitmap = Bitmap.createBitmap(getMeasuredWidth(), getMeasuredHeight(),
                 Bitmap.Config.ARGB_8888);
         mCanvas = new Canvas(mBitmap);
         mPaint = new Paint();
         mPaint.setColor(mColor);
         mPaint.setAntiAlias(true);
         mPaint.setDither(true);
         mPaint.setAlpha(alpha);
         mCanvas.drawRect(mBitmapBounds, mPaint);
         //设置显示纯色区域与图标的交集区域,即显示的是图标以及颜色为纯色区域的颜色
         mPaint.setXfermode(new PorterDuffXfermode(PorterDuff.Mode.DST_IN));
         mPaint.setAlpha(255);
         mCanvas.drawBitmap(mIconBitmap, null, mBitmapBounds, mPaint);
     }
     //设置alpha值
     public void setAlphaView(float alpha){
         this.alpha = alpha;
         invalidateView();
     }
     //当alpha值变化时,重绘视     private void invalidateView() {
         //判断是否是在UI线程
         if(Looper.getMainLooper() == Looper.myLooper()){
             invalidate();
         }else{
             postInvalidate();
         }
     }
     //保存数据值及状态,防止Activity被系统销毁时在回到主界面时显示不正常的现象
     @Override
     protected Parcelable onSaveInstanceState() {
         Bundle bundle = new Bundle();
         bundle.putParcelable(INSTANCE_STATUS,super.onSaveInstanceState());
         bundle.putFloat(ALPHA_STATUS,alpha);
         return bundle;
     }
     //回复原先保存的数据值及状态
     @Override
     protected void onRestoreInstanceState(Parcelable state) {
         if(state instanceof Bundle){
             Bundle bundle = (Bundle) state;
            alpha = bundle.getFloat(ALPHA_STATUS);
             super.onRestoreInstanceState(bundle.getParcelable(INSTANCE_STATUS));
             return;
         }
         super.onRestoreInstanceState(state);
     }
 }
然后是在MainActivity中实现滑动更新tab,以及点击tab更新fragment的逻辑:
   public class MainActivity extends FragmentActivity implements View.OnClickListener, ViewPager.OnPageChangeListener {

       private ViewPager viewPager;
       //fragment中显示的文本内容
       private String[] mTitles = new String[]{"first tab fragment", "second tab fragment",
               "third tab fragment", "fourth tab fragment"};

       private FragmentPagerAdapter mAdapter;

      private List<Fragment> mData = new ArrayList<>();
      //管理四个tab的List集合
      private List<ChangeIconColorWithText> tabList = new ArrayList<>();

      @Override
      protected void onCreate(Bundle savedInstanceState) {
          super.onCreate(savedInstanceState);
          setContentView(R.layout.activity_main);
          setOverflowShowingAlways();
          getActionBar().setDisplayHomeAsUpEnabled(false);

          initView();
         initData();
          viewPager.setAdapter(mAdapter);
          viewPager.setOnPageChangeListener(this);
      }

      private void initData() {
          for(String title : mTitles){
              TabFragment tabFragment = new TabFragment();
              Bundle bundle = new Bundle();
              bundle.putString(TabFragment.TITLE,title);
              tabFragment.setArguments(bundle);
              mData.add(tabFragment);
          }

          mAdapter = new FragmentPagerAdapter(getSupportFragmentManager()) {
              @Override
              public Fragment getItem(int position) {
                  return mData.get(position);
              }

              @Override
              public int getCount() {
                  return mData.size();
              }
          };
      }

      private void initView() {
          viewPager = (ViewPager) findViewById(R.id.viewPager);
          ChangeIconColorWithText one = (ChangeIconColorWithText) findViewById(R.id.tab_indicator_one);
          tabList.add(one);
          ChangeIconColorWithText two = (ChangeIconColorWithText) findViewById(R.id.tab_indicator_two);
          tabList.add(two);
          ChangeIconColorWithText three = (ChangeIconColorWithText) findViewById(R.id.tab_indicator_three);
          tabList.add(three);
          ChangeIconColorWithText four = (ChangeIconColorWithText) findViewById(R.id.tab_indicator_four);
          tabList.add(four);

          one.setOnClickListener(this);
          two.setOnClickListener(this);
          three.setOnClickListener(this);
          four.setOnClickListener(this);
          resetOtherTab();
         one.setAlphaView(1);
     }


      @Override
      public boolean onCreateOptionsMenu(Menu menu) {
          getMenuInflater().inflate(R.menu.menu_main, menu);

          return true;
     }

      @Override
      public boolean onOptionsItemSelected(MenuItem item) {
          int id = item.getItemId();

          if (id == R.id.action_settings) {
              return true;
          }
          return super.onOptionsItemSelected(item);
      }

      //是更多菜单按钮显示出来
      private void setOverflowShowingAlways() {
          try {
              ViewConfiguration config = ViewConfiguration.get(this);
              Field menuKeyField = ViewConfiguration.class
                      .getDeclaredField("sHasPermanentMenuKey");
              menuKeyField.setAccessible(true);
              menuKeyField.setBoolean(config, false);
          } catch (Exception e) {
              e.printStackTrace();
          }
      }

      @Override
     public boolean onMenuOpened(int featureId, Menu menu) {
        if (featureId == Window.FEATURE_ACTION_BAR && menu != null) {
             if (menu.getClass().getSimpleName().equals("MenuBuilder")) {
                 try {
                     Method m = menu.getClass().getDeclaredMethod(
                             "setOptionalIconsVisible", Boolean.TYPE);
                     m.setAccessible(true);
                     m.invoke(menu, true);
                 } catch (Exception e) {
                 }
             }
         }
         return super.onMenuOpened(featureId, menu);
     }

     @Override
     public void onClick(View v) {
         resetOtherTab();
         switch(v.getId()){
             case R.id.tab_indicator_one:
                 tabList.get(0).setAlphaView(1);
                 viewPager.setCurrentItem(0,false);
                 break;
             case R.id.tab_indicator_two:
                 tabList.get(1).setAlphaView(1);
                 viewPager.setCurrentItem(1,false);
                 break;
             case R.id.tab_indicator_three:
                 tabList.get(2).setAlphaView(1);
                 viewPager.setCurrentItem(2,false);
                 break;
             case R.id.tab_indicator_four:
                 tabList.get(3).setAlphaView(1);
                 viewPager.setCurrentItem(3,false);
                 break;
         }
     }

     private void resetOtherTab() {         for(int i = 0; i < tabList.size(); i++){
             tabList.get(i).setAlphaView(0);
         }
     }
   //这里是在ViewPager滑动时,因为只有两个tab的颜色会发生变化,所以通过将他们的icon和文本颜色的alpha值进行改变,从而产生渐变的效果。
     @Override
     public void onPageScrolled(int position, float positionOffset, int positionOffsetPixels) {
         if(positionOffset > 0){
             ChangeIconColorWithText left = tabList.get(position);
             ChangeIconColorWithText right = tabList.get(position + 1);

             left.setAlphaView(1-positionOffset);
             right.setAlphaView(positionOffset);
         }
     }

     @Override
     public void onPageSelected(int position) {

     }

     @Override
     public void onPageScrollStateChanged(int state) {

     }
fragment:
  public class TabFragment extends Fragment {

      private static String mTitle = "default";
      public static final String TITLE = "title";
      @Override
      public View onCreateView(LayoutInflater inflater,ViewGroup container,Bundle savedInstanceState) {
          TextView tv = new TextView(getActivity());
          if(getArguments() != null) {
              mTitle = getArguments().getString(TITLE);
         }
         tv.setText(mTitle);
         tv.setTextSize(20);
         tv.setTextColor(Color.BLACK);
         tv.setGravity(Gravity.CENTER);
         return tv;
     }
 }
基本内容就是这些,其中自定义View是难点,主要是自定义View中的绘制方法,XferMode的DST_IN方法。这里记录下来,以后慢慢学习。 |
自学PHP网专注网站建设学习,PHP程序学习,平面设计学习,以及操作系统学习
京ICP备14009008号-1@版权所有www.zixuephp.com
网站声明:本站所有视频,教程都由网友上传,站长收集和分享给大家学习使用,如由牵扯版权问题请联系站长邮箱904561283@qq.com