PermalinkMy Problem 我的问题
In my job, I often need some information to stay on top of eveything. I’ve tried may types of stickit notes and other programs, but they all seem to be too large and not easy to script. I also need information from several systems in my home network. Therefore, I created the original BulletinBoard in NW.js that works quite well, but now I need to make it smaller. Also, the old code is kind of hacky. NW.js is a great way to build applications using HTML, CSS, and JavaScript. Since it is so easy to use, I’ve used it to create first pass demo applications. The problem with it is that it’s a full Chrome web browser. For a small application, that is just too much wasted memory. Therefore, I’m doing a full redesign in Wails to bring down it’s footprint.
在我的工作中,我经常需要一些信息来掌握一切。我尝试过各种类型的便签和其他程序,但它们似乎都太大了,不容易编写脚本。我还需要来自家庭网络中多个系统的信息。因此,我在 NW.js 中创建了运行良好的原始公告板,但现在我需要使其更小。此外,旧代码有点骇人听闻。NW.js 是使用 HTML、CSS 和 JavaScript 构建应用程序的好方法。由于它非常易于使用,我用它来创建首过演示应用程序。它的问题在于它是一个完整的 Chrome 网络浏览器。对于一个小型应用程序来说,这浪费了太多内存。因此,我正在对 Wails 进行全面重新设计,以减少它的足迹。
PermalinkWails 哀号
Wails is a go language program to create HTML, CSS, and JavaScript applications with a go language backend. It creates really small builds because it uses a system HTML browser that is minimal in size (and therefore, minimal APIs). This allows the program to work on Windows, Linux, and macOS and still have a very small footprint. I’ve converted several of my programs to Wails: Modal File Manager, EmailIt, and ScriptBar.
Wails 是一个 go 语言程序,用于创建具有 go 语言后端的 HTML、CSS 和 JavaScript 应用程序。它创建非常小的构建,因为它使用最小尺寸的系统 HTML 浏览器(因此,最小的 API)。这使得该程序可以在 Windows、Linux 和 macOS 上运行,并且占用空间仍然非常小。我已经将我的几个程序转换为 Wails:Modal File Manager、EmailIt 和 ScriptBar。
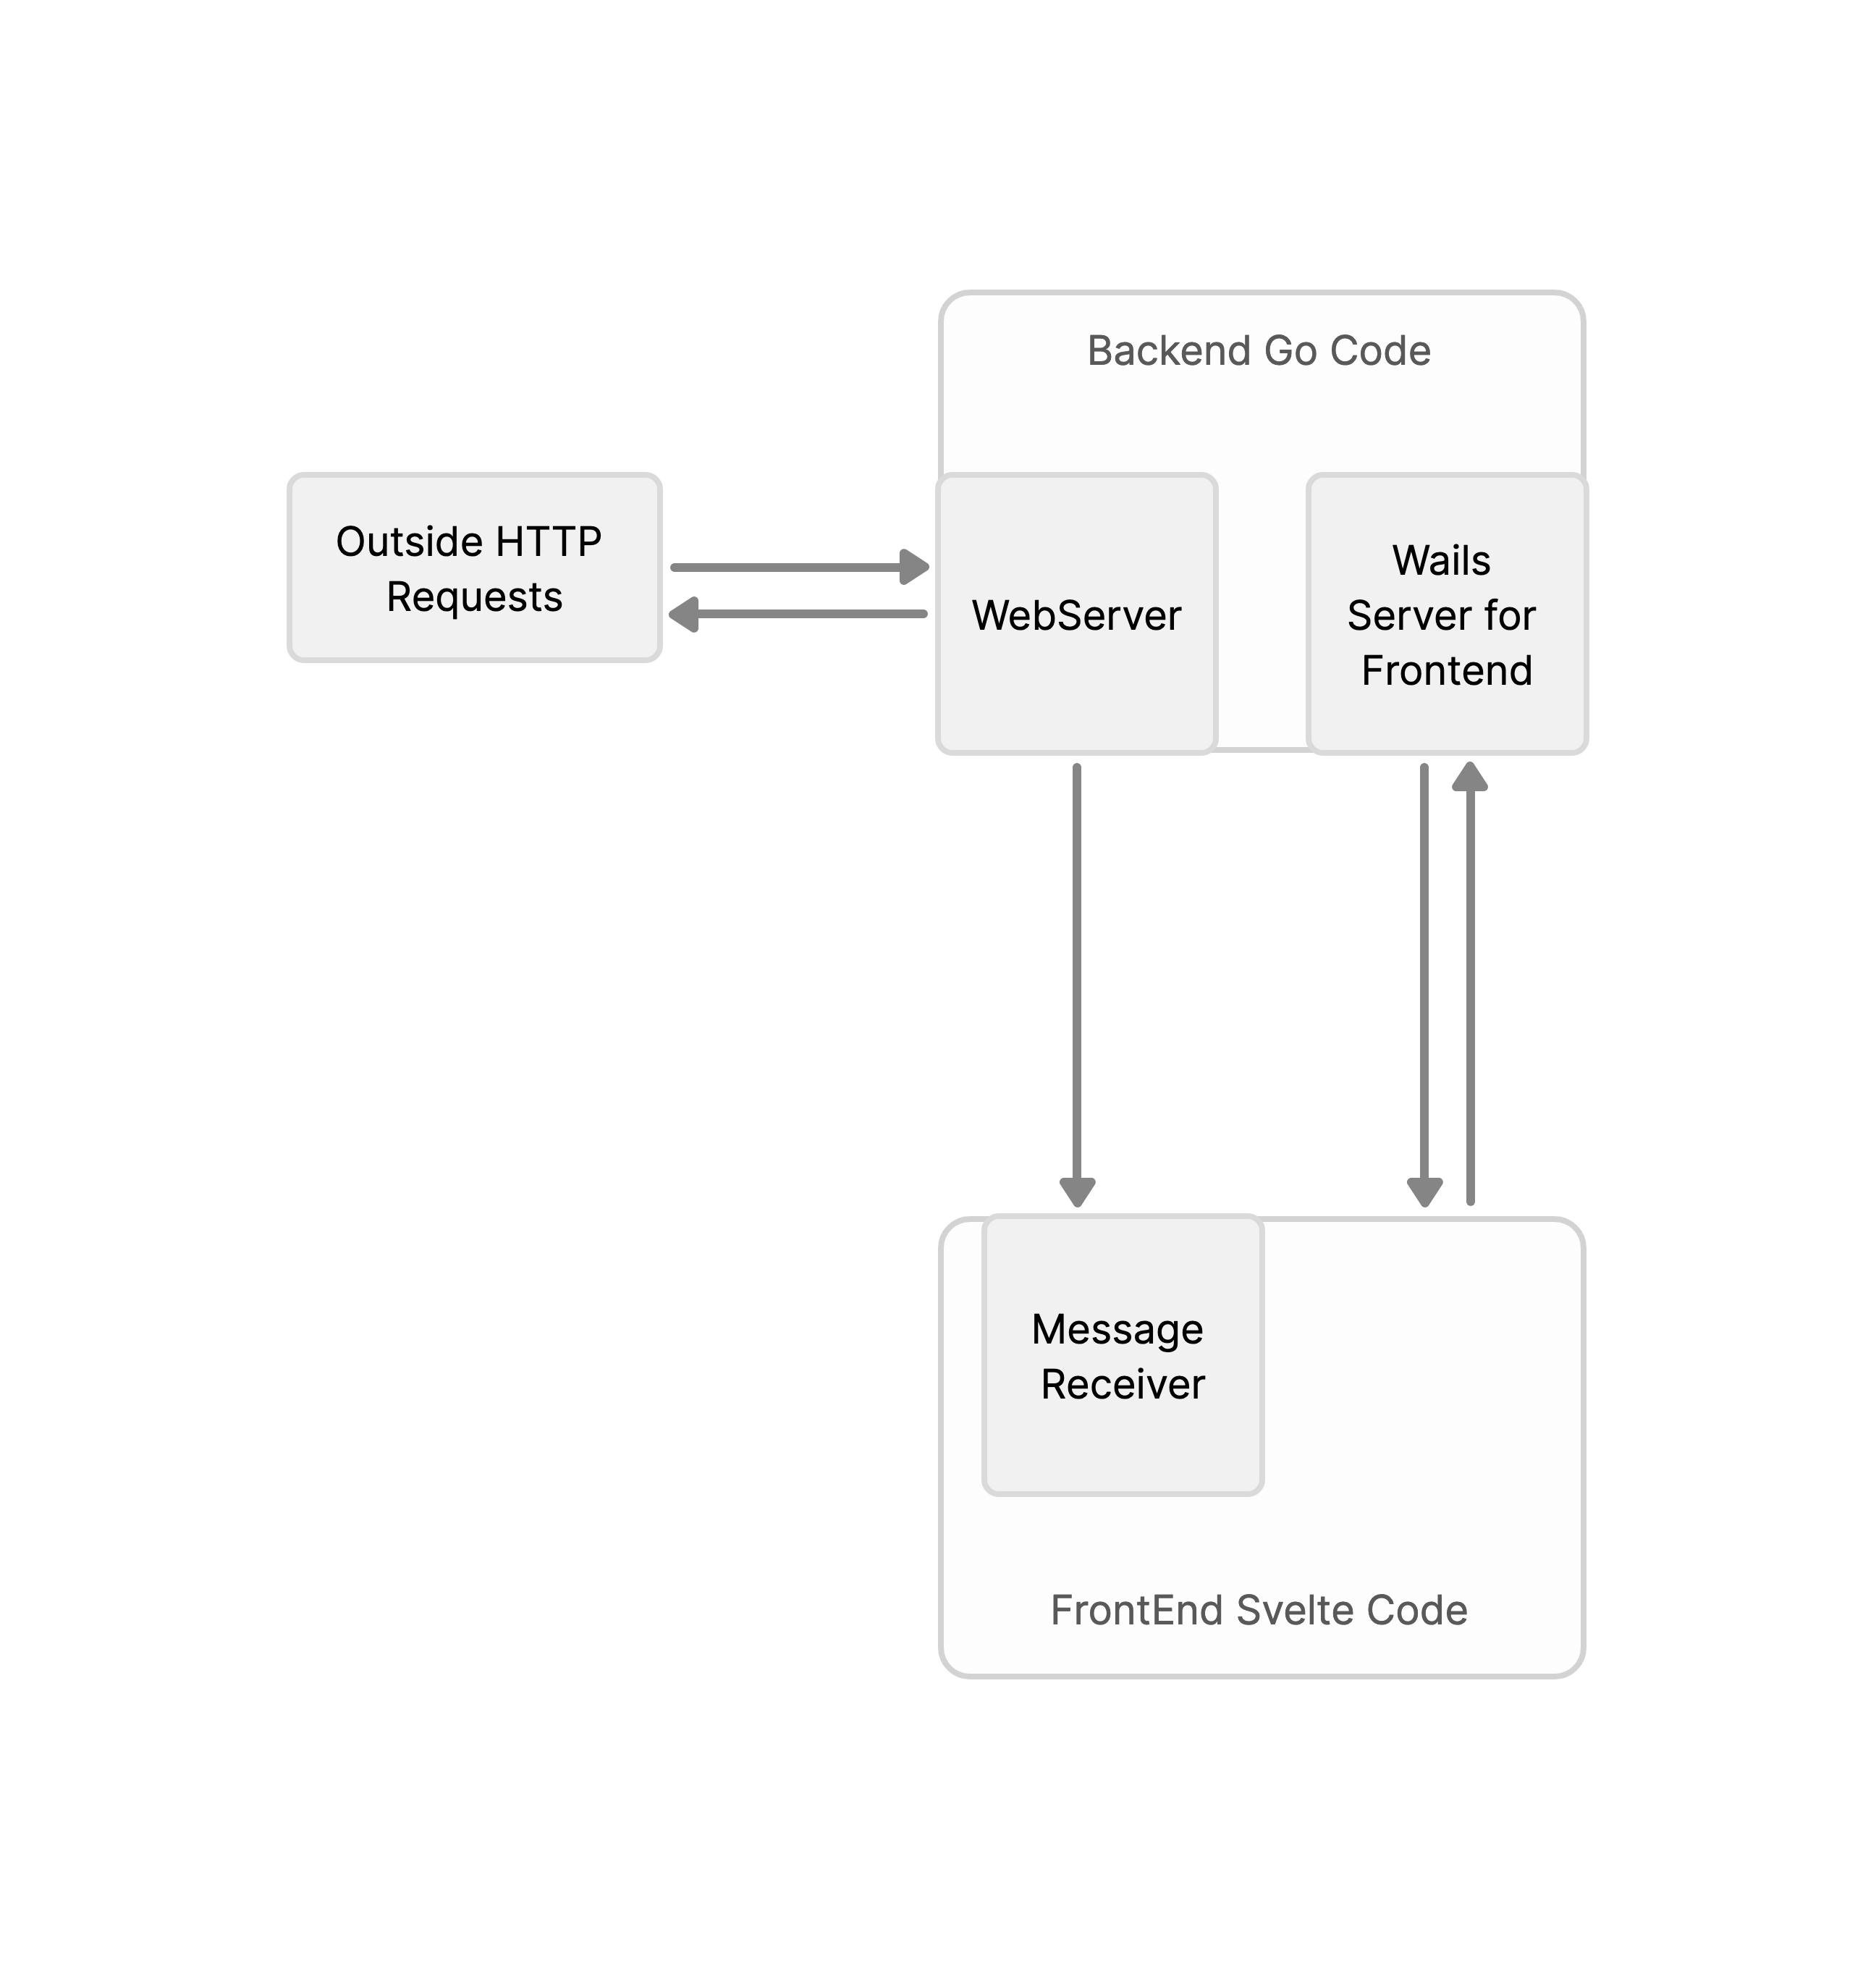
In order to get the same functionality with the original BulletinBoard program, I need to have a full web server built in. The orginal version allowed me to do just that with the Node.js backend. Now, I need to figure out how to do the same with go lang and still work with Wails.
为了获得与原始 BulletinBoard 程序相同的功能,我需要内置一个完整的 Web 服务器。原始版本允许我使用 Node.js 后端做到这一点。现在,我需要弄清楚如何使用 go lang 做同样的事情,并且仍然使用 Wails。
Wails already runs a web server backend (I suspect it is web sockets based) to work with the frontend of the program. Since I can’t piggy back on it, I have to have a separate web server backend. This is necessary since the frontend JavaScript doesn’t support doing a server.
Wails 已经运行了一个 Web 服务器后端(我怀疑它是基于 Web 套接字的)来与程序的前端一起工作。由于我无法依靠它,因此我必须有一个单独的 Web 服务器后端。这是必要的,因为前端 JavaScript 不支持做服务器。
The question becomes: Can you run a separate web server on the same go backend?
问题变成了:你能在同一个后端运行一个单独的 Web 服务器吗?
PermalinkThings Wails Currently Doesn’t Do
Wails 目前不做的事情
While writing this article, Wails 2 is still in development and doesn’t have every feature needed for this application. For instance, it can’t run with the Dock icon not showing and a menubar icon only. Those are still in the works. But, it can control the hiding and showing of the program. It can also make the window always on top. Therefore, most of the functionality is ready for this application.
在撰写本文时,Wails 2 仍在开发中,并不具备此应用程序所需的所有功能。例如,它无法在不显示 Dock 图标且仅显示菜单栏图标的情况下运行。这些仍在进行中。但是,它可以控制程序的隐藏和显示。它还可以使窗口始终位于顶部。因此,大多数功能都已准备好用于此应用程序。
PermalinkBulletin Board Design 公告板设计
The go language has several backends for running a web server. I’ve decided to use the gin backend since it is real easy to use and seems to be the most popular one. I’ve only done one project in go before, but it is an easy language to pickup.
go 语言有几个用于运行 Web 服务器的后端。我决定使用杜松子酒后端,因为它非常易于使用,而且似乎是最受欢迎的后端。我以前只做过一个 go 项目,但它是一种很容易上手的语言。
The design is based on an API backend that receives GET requests on the route /api/messages/:message with the :message is the message to display. The same message is in the body in JSON format as:
该设计基于 API 后端,该后端在路由 /api/messages/:message 上接收 GET 请求, :message 并显示 is 消息。JSON格式的正文中包含相同的消息:
{
  msg: message
}
Where message is the same text in the web address. It's done this way because of the original design was first based on the web address only, but longer messages needed the body. It is a hack, but it worked and there isn’t time to change everything! Also, a GET request is easy to implement in scripting languages (like using wget or curl command line programs).
网址中的相同文本在哪里 message 。之所以这样做,是因为最初的设计首先仅基于网址,但更长的消息需要正文。这是一个黑客,但它奏效了,没有时间改变一切!此外,GET 请求很容易在脚本语言(如使用 wget 或 curl 命令行程序)中实现。
PermalinkBulletinBoard Communications - Made with OneModel
公告板通信 - 使用 OneModel 制作
The backend receives this request and uses signals to pass it to the frontend. Wails has a great event based message sending framework. The frontend is done using Svelte. The original was plain JavaScript and HTML and not too pretty (Okay, it was a quick hack). Now, I’m using a nice framework to build a modular system that is easy to expand.
后端接收此请求,并使用信号将其传递给前端。Wails 有一个很棒的基于事件的消息发送框架。前端是使用 Svelte 完成的。原版是普通的 JavaScript 和 HTML,不太漂亮(好吧,这是一个快速的黑客)。现在,我正在使用一个很好的框架来构建一个易于扩展的模块化系统。
The original design allowed for dialogs to send back information as well. For this project, I’m just doing the messaging system to see if I can get it to work using Wails and the go language server.
最初的设计也允许对话框发回信息。对于这个项目,我只是在做消息传递系统,看看我是否可以使用 Wails 和 go 语言服务器让它工作。
PermalinkLet’s Get Started 让我们开始吧
To get started, you need to install nodejs with npm, go language, and Wails 2. I’m using version 43 of Wails 2 in this article.
首先,您需要使用 npm、go language 和 Wails 2 安装 nodejs。在本文中,我使用的是 Wails 2 的 43 版本。
Create a directory for your project and run the following command line to initialize a Wails project with Svelte:
为您的项目创建一个目录,并运行以下命令行以使用 Svelte 初始化 Wails 项目:
wails -n “BulletinBoard” -d . -t “svelte"
This will create a Svelte frontend Wails project with normal JavaScript. If you want to use TypeScript, use the template “svelte-ts”.
这将创建一个使用普通 JavaScript 的 Svelte 前端 Wails 项目。如果要使用 TypeScript,请使用模板“svelte-ts”。
The first thing is to setup the main.go file as shown below:
第一件事是设置文件, main.go 如下所示:
package main

import (
    "embed"

    "github.com/wailsapp/wails/v2"
    "github.com/wailsapp/wails/v2/pkg/options"
    "github.com/wailsapp/wails/v2/pkg/options/mac"
)

//go:embed frontend/dist
var assets embed.FS

//go:embed build/appicon.png
var icon []byte

func main() {
    // Create an instance of the app structure
    app := NewApp()

    // Create application with options
    err := wails.Run(&options.App{
        Title:             "BulletinBoard",
        Width:             100,
        Height:            60,
        Assets:            assets,
        BackgroundColour:  &options.RGBA{R: 27, G: 38, B: 54, A: 0},
        DisableResize:     true,
        Fullscreen:        false,
        Frameless:         false,
        StartHidden:       true,
        AlwaysOnTop:       true,
        HideWindowOnClose: true,
        OnStartup:         app.startup,
        OnDomReady:        app.domReady,
        OnShutdown:        app.shutdown,
        Bind: []interface{}{
            app,
        },
        Mac: &mac.Options{
            TitleBar:             mac.TitleBarHiddenInset(),
            Appearance:           mac.NSAppearanceNameDarkAqua,
            WebviewIsTransparent: true,
            WindowIsTranslucent:  true,
            About: &mac.AboutInfo{
                Title:   "BulletinBoard",
                Message: "© 2022 Richard Guay <raguay@customct.com>",
                Icon:    icon,
            },
        },
    })

    if err != nil {
        println("Error:", err.Error())
    }
}
This setups a typical program with transparent backgrounds and hidden on startup. The OnStartup entry is set to app.startup which is where we will launch our server. Launching the server at this location will have all the custom code in one place and allows the Wails server for the frontend to be initialized first.
这将设置一个具有透明背景并在启动时隐藏的典型程序。该 OnStartup 条目设置为 app.startup 我们将启动服务器的位置。在此位置启动服务器会将所有自定义代码放在一个地方,并允许首先初始化前端的 Wails 服务器。
Next, we need to create our application logic in the app.go file. Add the following information:
接下来,我们需要在 app.go 文件中创建应用程序逻辑。添加以下信息:
package main

import (
    "context"
    "github.com/gin-gonic/gin”    // webserver framework
    rt "github.com/wailsapp/wails/v2/pkg/runtime”. // Wails runtime
    "net/http"
    "net/url"
)

// App struct
type App struct {
    ctx context.Context
}

// NewApp creates a new App application struct
func NewApp() *App {
    return &App{}
}

func (a *App) domReady(ctx context.Context) {

}

func (a *App) shutdown(ctx context.Context) {

}

// startup is called when the app starts. The context is saved
// so we can call the runtime methods
func (a *App) startup(ctx context.Context) {
    a.ctx = ctx

    //
    // We need to start the backend and setup the signaling.
    //
    go backend(ctx)
}
This is mostly setup code except for the startup function. The ctx variable is the context for the whole application and is needed for the server to run. It is passed to the server using the line:
这主要是设置代码,但启动函数除外。变量 ctx 是整个应用程序的上下文,是服务器运行所必需的。它使用以下行传递到服务器:
go backend(ctx)
The go at the front of the backend function name tells go to run the server as a go coroutine. This runs on a separate thread that doesn’t interfere with the other frontend code. This allows the server to run without bothering anything else and makes this project functional.
后端函数名称前面的 go go 告诉 go 将服务器作为 go 协程运行。这在单独的线程上运行,该线程不会干扰其他前端代码。这允许服务器在不打扰其他任何事情的情况下运行,并使该项目正常运行。
Then add the following to the bottom of the app.go file:
然后将以下内容添加到 app.go 文件底部:
type Msg struct {
    Message string `json:"msg" xml:"user"  binding:"required"`
}

func backend(ctx context.Context) {
    //
    // This will have the web server backend for BulletinBoard.
    //
    r := gin.Default()
    r.Use(gin.Recovery())

    //
    // Define the message route. The message is given on the URI string and in the body.
    //
    r.GET("/api/message/:message", func(c *gin.Context) {
        c.JSON(http.StatusOK, gin.H{
            "msg": "okay",
        })
        var json Msg
        if err := c.ShouldBindJSON(&json); err != nil {
            c.JSON(http.StatusBadRequest, gin.H{"error": err.Error()})
            return
        }
        message := c.Param("message")
        messageBody := json.Message
        if messageBody != message {
            message = messageBody
        }

        message, err := url.QueryUnescape(message)
        if err != nil {
            // An error in decoding.
            message = ""
        }

        //
        // Send it to the frontend.
        //
        rt.EventsEmit(ctx, "message", message)
    })

    //
    // Run the server.
    //
    r.Run(":9697")
}
This is a basic setup for a single route in the gin web server framework. It is very basic right now, but very functional. I need to add middleware that does security checking to make the program more secure. But, we just want to demostrate that this approach is possible.
这是 gin Web 服务器框架中单个路由的基本设置。它现在非常基本,但非常实用。我需要添加进行安全检查的中间件,以使程序更安全。但是,我们只想证明这种方法是可能的。
The function for the route gets the message from the URI and the body JSON structure. It then decodes it from URI encoding and checks to see if they are the same. If so, just send on the one from the URL. Otherwise, it sends the one from the body.
路由的函数从 URI 和正文 JSON 结构中获取消息。然后,它从 URI 编码中对其进行解码,并检查它们是否相同。如果是这样,只需从 URL 发送一个。否则,它会从正文发送那个。
The interesting part is the next line that uses Wails runtime rt.EventsEmit() function to tell the frontend that we have a new message to display. The event has the name “message” that the frontend will receive and setup for displaying a message. This is important for expanding for other types in the future.
有趣的部分是下一行,它使用 Wails 运行时 rt.EventsEmit() 函数告诉前端我们有一条新消息要显示。该事件的名称为“message”,前端将接收该名称,并设置该名称用于显示消息。这对于将来扩展到其他类型非常重要。
In the frontend/src/main.js file, add this information:
在 frontend/src/main.js 文件中,添加以下信息:
import BulletinBoard from './BulletinBoard.svelte'

const app = new BulletinBoard({
  target: document.body
})

export default BulletinBoard
This is simple boilerplate code for starting a Svelte application. The BulletinBoard.svelte file is the main program.
这是用于启动 Svelte 应用程序的简单样板代码。该文件 BulletinBoard.svelte 是主程序。
Now for the main program. Create the BulletinBoard.svelte file with the frontend/src directory with the following code:
现在是主程序。使用以下代码创建 frontend/src 包含目录 BulletinBoard.svelte 的文件:
<script>
  import { onMount, afterUpdate } from "svelte";
  import Message from "./components/Message.svelte";
  import { state } from "./stores/state.js";
  import { theme } from "./stores/theme.js";
  import { message } from "./stores/message.js";
  import * as rt from "../wailsjs/runtime/runtime.js"; // the runtime for Wails2

  let containerDOM = null;
  let minWidth = 300;
  let minHeight = 60;

  onMount(() => {
    $state = "nothing";
    getTheme();

    //
    // Set a function to run when a event (signal) is sent from the webserver.
    //
    rt.EventsOn("message", (msg) => {
      if (msg.trim().length !== 0) {
        //
        // Set the message state and save the message in the store.
        //
        $state = "message";
        $message = msg;

        //
        // Show window in case it's off.
        //
        rt.WindowShow();
      } else {
        //
        // An empty message send by having just a space turns off the BulletinBoard.
        //
        rt.WindowHide();
      }
    });
  });

  afterUpdate(() => {
    //
    // The nothing state should force a window hiding.
    //
    if($state === "nothing") {
      rt.WindowHide();
    }

    //
    // Figure out the width and height of the new canvas.
    //
    if (containerDOM !== null) {
        let width = minWidth;
        let height = minHeight;
        if (height < containerDOM.clientHeight) height = containerDOM.clientHeight;
        if (width < containerDOM.clientWidth) width = containerDOM.clientWidth;
      rt.WindowSetSize(width, height);
    }
  });

  function getTheme(callback) {
    //
    // This would read the theme from a file. It currently just sets a typical theme.
    // I love the Dracula color theme.
    //
    $theme = {
      font: "Fira Code, Menlo",
      fontSize: "12pt",
      textAreaColor: "#454158",
      backgroundColor: "#22212C",
      textColor: "#80ffea",
      borderColor: "#1B1A23",
      Cyan: "#80FFEA",
      Green: "#8AFF80",
      Orange: "#FFCA80",
      Pink: "#FF80BF",
      Purple: "#9580FF",
      Red: "#FF9580",
      Yellow: "#FFFF80",
    };
  }
</script>

<div
  id=“closure"
  bind:this={containerDOM}
  style="background-color: {$theme.backgroundColor}; color:
  {$theme.textColor}; font-family: {$theme.font}; font-size:
  {$theme.fontSize};"
>
  <div id="header" data-wails-drag>
    <h3>Bulletin Board</h3>
  </div>
  <div id="main">
    {#if $state === "message"}
      <Message />
    {/if}
  </div>
</div>

<style>
  :global(body) {
    margin: 0px;
    padding: 0px;
    overflow: hidden;
    border: transparent solid 1px;
    border-radius: 10px;
    background-color: transparent;
  }

  #closure {
    display: flex;
    flex-direction: column;
    margin: 0px;
    padding: 0px;
    border-radius: 10px;
    overflow: hidden;
  }

  #header {
    height: 20px;
    margin: 0px;
    padding: 5px;
    -webkit-user-select: none;
    user-select: none;
    cursor: default;
  }

  #main {
    display: flex;
    flex-direction: column;
    margin: 0px 0px 0px 20px;
    padding: 0px;
    min-width: 100px;
  }

  h3 {
    text-align: center;
    margin: 0px;
    padding: 0px;
    cursor: default;
    font-size: 1 em;
  }
</style>
The onMount function tells Svelte compiler to run the code while mounting this component. This code initializes the theme stored in the $theme state store. The function then sets up the event receiver to receive “message” events using the rt.EventsOn function. When it gets a message, it sets the $message store variable to it and sets the $state store variable to “message”. This tells the HTML code to show the Message component and show the window using rt.ShowWindow().
该 onMount 函数告诉 Svelte 编译器在挂载此组件时运行代码。此代码初始化存储在 $theme 状态存储中的主题。然后,该函数将事件接收器设置为使用该 rt.EventsOn 函数接收“消息”事件。当它收到消息时,它会将 $message 存储变量设置为该消息,并将$state存储变量设置为“message”。这会告诉 HTML 代码显示 Message 组件并使用 rt.ShowWindow() 显示窗口。
The bind:this={containerDOM} will put the DOM node into the variable containerDOM. This can then be queried to find out information about the div node that contains the message.
将 bind:this={containerDOM} DOM 节点放入变量 containerDOM .然后可以查询此消息以查找有关包含消息的 div 节点的信息。
The next interesting bit of code is in the afterUpdate function call. This sets a function to call after all components are setup and visible. In this one, it first sets the window to hidden if the state equals “nothing”. Therefore, it creates an easy way to hide the window from anywhere simply by setting the state variable. Secondly, it uses the containerDOM variable to adjust the window size based on the application div size. It also keeps it from getting too small.
接下来一个有趣的代码是在函数调用中 afterUpdate 。这将设置一个函数,以便在所有组件都设置完毕并可见后调用。在这个例子中,它首先将窗口设置为隐藏,如果状态等于“nothing”。因此,它创建了一种简单的方法,只需设置状态变量即可从任何地方隐藏窗口。其次,它使用变量 containerDOM 根据应用程序 div 大小调整窗口大小。它还可以防止它变得太小。
The rest of the code simply sets up the HTML and CSS for creating the main window. Now, we can go on to the Message component.
代码的其余部分只是设置用于创建主窗口的 HTML 和 CSS。现在,我们可以继续 Message 组件。
Now create the frontend/src/components/ directory and create the Message.svelte file with this information:
现在创建 frontend/src/components/ 目录并使用以下信息创建 Message.svelte 文件:
<script>
  import { message } from "../stores/message.js";
</script>

<div id="message">
  <span>{$message}</span>
</div>

<style>
  #message {
    display: flex;
    flex-direction: column;
    margin: 0px;
    padding: 10px;
  }
</style>
This is an easy component since it just displays a message. You might be thinking that I’m showing unsantitize user given information in the HTML with the line {$message}. The brackets tell Svelte to get the result of the JavaScript expression, santitize it, and display it. Here, we are displaying the information in the $message store variable. Since Svelte does the sanitizing, I don’t have to worry about it.
这是一个简单的组件,因为它只显示一条消息。您可能会认为我在 HTML 中显示 unsantitize 用户给定的信息,并带有 {$message} .括号告诉 Svelte 获取 JavaScript 表达式的结果,对其进行 santitize 并显示它。在这里,我们显示 $message 存储变量中的信息。由于 Svelte 会进行消毒,因此我不必担心。
This looks very trivial to make a full component, but this is modular design. I just add more components for doing different types of displaying. The other display types will have much more code in them.
这看起来非常微不足道,但这是模块化设计。我只是添加了更多组件来执行不同类型的显示。其他显示类型将包含更多代码。
The remaining parts are the different Svelte stores used in this project. The different stores are in the directory frontend/src/stores and can seen in the GitHub BulletinBoard project page. This is an ongoing project and this repro reflects that with more functionality being written each week….well, when I have time for them.
其余部分是本项目中使用的不同 Svelte 商店。不同的商店位于目录中 frontend/src/stores ,可以在 GitHub BulletinBoard 项目页面中看到。这是一个正在进行的项目,这个重现反映了每周都会编写更多功能......好吧,当我有时间的时候。
The application is built with the command line:
应用程序是使用命令行构建的:
wails build --platform "darwin/universal”
Which creates a macOS universal binary and bundles it all up in an application bundle called BulletinBoard.app in the build/bin directory.
这将创建一个 macOS 通用二进制文件,并将其全部捆绑在 build/bin 目录中调用 BulletinBoard.app 的应用程序包中。
If you aren’t on a macOS system, then just use:
如果您使用的不是 macOS 系统,则只需使用:
wails build
When the application is ran, a requester dialog asking if you want it to allow the program to accept incoming network connections will appear (macOS only). Simply allow it and the program is running. But wait, nothing shows up. That is because the application was started in the hidden state. In order for the program to become visible, it has to receive a message request.
运行应用程序时,将出现一个请求者对话框,询问您是否希望它允许程序接受传入的网络连接(仅限 macOS)。只需允许它,程序就会运行。但是等等,什么也没出现。这是因为应用程序是在隐藏状态下启动的。为了使程序变得可见,它必须接收消息请求。
In order to send messages to it, you have to create a message sending program. This is done with a small ruby script:
为了向它发送消息,您必须创建一个消息发送程序。这是通过一个小的 ruby 脚本完成的:
#!/usr/bin/env ruby
require 'net/http'
require 'json'

def uri_encode(str)
  str.gsub(URI::UNSAFE) do |match|
    match.each_byte.map { |c| sprintf('%%%02X', c.ord) }.join
  end
end
if ARGV[0] == '-' then
  message = ''
else
  message = uri_encode(ARGV[0])
end

uri = URI("http://localhost:9697/api/message/#{message}")
http = Net::HTTP.new(uri.host, uri.port)
req = Net::HTTP::Get.new(uri.path, 'Content-Type' => 'application/json')
req.body = {msg: "#{message}"}.to_json
res = http.request(req)
puts "response #{res.body}”
If you put this in a file named ‘sendmsg’ and set it to executable, you can type the following command line:
如果将其放在名为“sendmsg”的文件中并将其设置为可执行文件,则可以键入以下命令行:
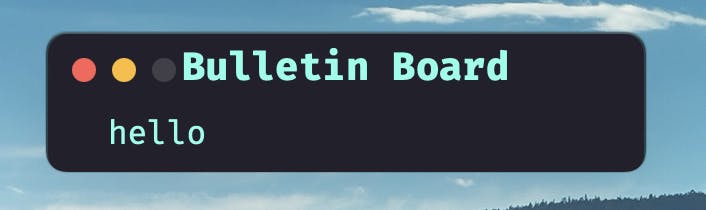
sendmsg “hello”
The BulletinBoard application will show up like this:
BulletinBoard 应用程序将显示如下:
PermalinkConclusion 结论
This tutorial just proved that there can be multiple web servers inside of a single Wails application thanks to the go language's use of coroutines. This works great and now I can finish the other functions. I want to be able to display script supplied dialogs to the user and return JSON data structure with the results.
本教程刚刚证明了,由于 go 语言使用了协程,单个 Wails 应用程序内部可以有多个 Web 服务器。这很好用,现在我可以完成其他功能了。我希望能够向用户显示脚本提供的对话框,并返回带有结果的 JSON 数据结构。
If your interested in keeping up with this project or simply want to download the source yourself, you can find it on the GitHub page for BulletinBoard. It already doesn’t look like it does here since it is an ongoing project. It has a discussion board for asking questions or just to comment on it.
如果你有兴趣跟上这个项目,或者只是想自己下载源代码,你可以在 BulletinBoard 的 GitHub 页面上找到它。它看起来已经不像这里了,因为它是一个正在进行的项目。它有一个讨论板,用于提出问题或只是评论它。
On to the next steps!
继续下一步!
Note: The article picture is from Envato Elements.
注:文章图片来自Envato Elements。
Written by 作者


I'm a missionary in Thailand and a freelance programmer to help by the bills. I've been programming over 40 years!
我是泰国的一名传教士,也是一名自由程序员,负责帮助支付账单。我已经编程 40 多年了!
I'm a missionary in Thailand and a freelance programmer to help by the bills. I've been programming over 40 years!