来源:自学PHP网 时间:2015-04-16 10:50 作者: 阅读:次
[导读] [root@hqw ~] cd home app mysql[root@hqw mysql] ls--解压MySQL-community-5 1 73-1 rhel5 i386 rpm-bundle tar[root@hqw mysql] tar -xvf MySQL-community-5 1 73-1 rhel5 i386 rpm-bundle...
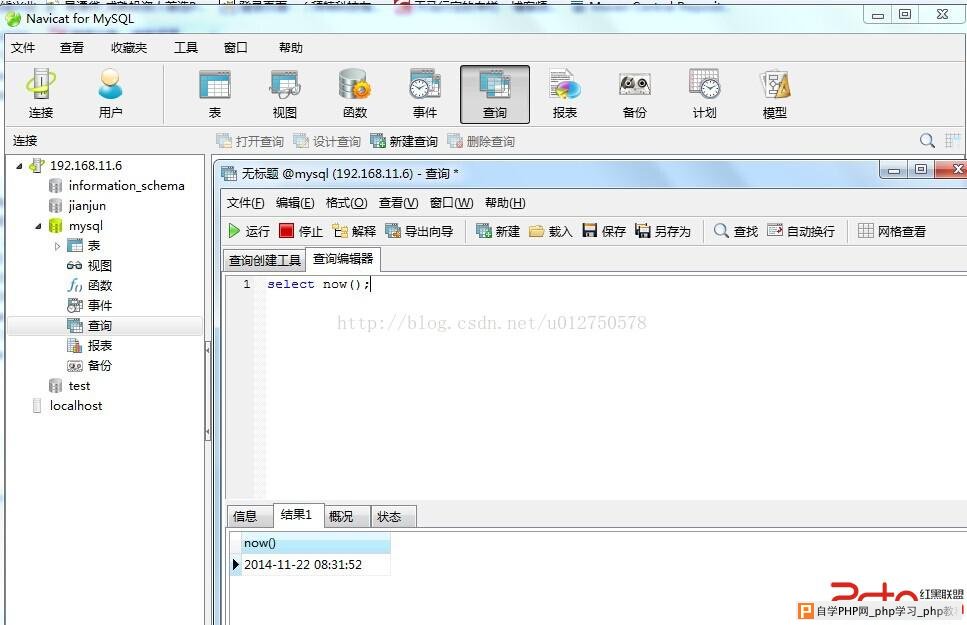
[root@hqw ~]# cd /home/app/mysql
[root@hqw mysql]# ls

--解压
MySQL-community-5.1.73-1.rhel5.i386.rpm-bundle.tar
[root@hqw mysql]# tar -xvf MySQL-community-5.1.73-1.rhel5.i386.rpm-bundle.tar
MySQL-test-community-5.1.73-1.rhel5.i386.rpm
MySQL-embedded-community-5.1.73-1.rhel5.i386.rpm
MySQL-devel-community-5.1.73-1.rhel5.i386.rpm
MySQL-shared-compat-5.1.73-1.rhel5.i386.rpm
MySQL-shared-community-5.1.73-1.rhel5.i386.rpm
MySQL-server-community-5.1.73-1.rhel5.i386.rpm
MySQL-client-community-5.1.73-1.rhel5.i386.rpm
MySQL-community-debuginfo-5.1.73-1.rhel5.i386.rpm

--安装
[root@hqw mysql]# rpm -ivh *.rpm
Preparing... ########################################### [100%]
1:MySQL-shared-community ########################################### [ 13%]
2:MySQL-devel-community ########################################### [ 25%]
3:MySQL-client-community ########################################### [ 38%]
4:MySQL-community-debugin########################################### [ 50%]
5:MySQL-embedded-communit########################################### [ 63%]
6:MySQL-server-community ########################################### [ 75%]

PLEASE REMEMBER TO SET A PASSWORD FOR THE MySQL root USER !
To do so, start the server, then issue the following commands:

/usr/bin/mysqladmin -u root password 'new-password'
/usr/bin/mysqladmin -u root -h hqw.net password 'new-password'

Alternatively you can run:
/usr/bin/mysql_secure_installation

which will also give you the option of removing the test
databases and anonymous user created by default. This is
strongly recommended for production servers.

See the manual for more instructions.

Please report any problems with the /usr/bin/mysqlbug script!

Starting MySQL..[ OK ]
Giving mysqld 2 seconds to start
7:MySQL-shared-compat ########################################### [ 88%]
8:MySQL-test-community ########################################### [100%]

--重置root密码
[root@hqw mysql]# /usr/bin/mysqladmin -u root -h hqw.net password 'root'
[root@hqw mysql]# /usr/bin/mysqladmin -u root password 'root'

--启动服务
[root@hqw mysql]# service mysql start
Starting MySQL [ OK ]

--root登录
[root@hqw mysql]# mysql -uroot -proot
Welcome to the MySQL monitor. Commands end with ; or \g.
Your MySQL connection id is 3
Server version: 5.1.73-community MySQL Community Server (GPL)

Copyright (c) 2000, 2013, Oracle and/or its affiliates. All rights reserved.

Oracle is a registered trademark of Oracle Corporation and/or its
affiliates. Other names may be trademarks of their respective
owners.

Type 'help;' or '\h' for help. Type '\c' to clear the current input statement.

mysql> select now();
+---------------------+
| now() |
+---------------------+
| 2014-11-22 08:01:09 |
+---------------------+
1 row in set (0.00 sec)

--新建远程账户

mysql> GRANT ALL PRIVILEGES ON *.* TO test@localhost IDENTIFIED BY 'test' WITH GRANT OPTION;
Query OK, 0 rows affected (0.00 sec)

mysql> GRANT ALL PRIVILEGES ON *.* TO test@"%" IDENTIFIED BY 'test' WITH GRANT OPTION;
Query OK, 0 rows affected (0.00 sec)

--刷新权限
mysql> flush privileges;
Query OK, 0 rows affected (0.00 sec)

mysql> exit

--远程数据库用户登录
[root@hqw mysql]# mysql -utest -ptest
Welcome to the MySQL monitor. Commands end with ; or \g.
Your MySQL connection id is 4
Server version: 5.1.73-community MySQL Community Server (GPL)

Copyright (c) 2000, 2013, Oracle and/or its affiliates. All rights reserved.

Oracle is a registered trademark of Oracle Corporation and/or its
affiliates. Other names may be trademarks of their respective
owners.

Type 'help;' or '\h' for help. Type '\c' to clear the current input statement.

mysql> select now();
+---------------------+
| now() |
+---------------------+
| 2014-11-22 08:02:36 |
+---------------------+
1 row in set (0.00 sec)

mysql>


mysql> exit
Bye
[root@hqw mysql]# exit
logout
Last login: Sat Nov 22 07:53:02 2014 from 192.168.11.1

--copy主配置文件
[root@hqw ~]# cp /usr/share/mysql/my-huge.cnf /etc/my.cnf

--往主配置文件添加 skip-name-resolve,skip-grant-tables为加快远程连接

--改动mysql的配置文件,在my.cnf中的[mysqld]下面(位置不能错)加上lower_case_table_name=1这句(1表示不区分大小写,0区分大小写),保存重新启动mysql

[root@hqw ~]# vi /etc/my.cnf
# Example MySQL config file for very large systems.
#
# This is for a large system with memory of 1G-2G where the system runs mainly
# MySQL.
#
# MySQL programs look for option files in a set of
# locations which depend on the deployment platform.
# You can copy this option file to one of those
# locations. For information about these locations, see:
# http://dev.mysql.com/doc/mysql/en/option-files.html
#
# In this file, you can use all long options that a program supports.
# If you want to know which options a program supports, run the program
# with the "--help" option.

# The following options will be passed to all MySQL clients
[client]
#password = your_password
port = 3306
socket = /var/lib/mysql/mysql.sock

# Here follows entries for some specific programs

# The MySQL server
[mysqld]
lower_case_table_name=1
skip-name-resolve
skip-grant-tables
port = 3306
socket = /var/lib/mysql/mysql.sock
skip-locking
"/etc/my.cnf" 149L, 4748C written
[root@hqw ~]#

--设置防火墙允许3306端口

[root@hqw ~]# vi /etc/sysconfig/iptables
# Firewall configuration written by system-config-securitylevel
# Manual customization of this file is not recommended.
*filter
:INPUT ACCEPT [0:0]
:FORWARD ACCEPT [0:0]
:OUTPUT ACCEPT [0:0]
:RH-Firewall-1-INPUT - [0:0]
-A INPUT -j RH-Firewall-1-INPUT
-A FORWARD -j RH-Firewall-1-INPUT
-A RH-Firewall-1-INPUT -i lo -j ACCEPT
-A RH-Firewall-1-INPUT -p icmp --icmp-type any -j ACCEPT
-A RH-Firewall-1-INPUT -p 50 -j ACCEPT
-A RH-Firewall-1-INPUT -p 51 -j ACCEPT
-A RH-Firewall-1-INPUT -p tcp -m state --state NEW -m tcp --dport 8080 -j ACCEPT
-A RH-Firewall-1-INPUT -p tcp -m state --state NEW -m tcp --dport 1158 -j ACCEPT
-A RH-Firewall-1-INPUT -p tcp -m state --state NEW -m tcp --dport 5560 -j ACCEPT
-A RH-Firewall-1-INPUT -p udp --dport 5353 -d 224.0.0.251 -j ACCEPT
-A RH-Firewall-1-INPUT -p udp -m udp --dport 631 -j ACCEPT
-A RH-Firewall-1-INPUT -p tcp -m tcp --dport 631 -j ACCEPT
-A RH-Firewall-1-INPUT -m state --state ESTABLISHED,RELATED -j ACCEPT
-A RH-Firewall-1-INPUT -m state --state NEW -m tcp -p tcp --dport 3306 -j ACCEPT
-A RH-Firewall-1-INPUT -m state --state NEW -m tcp -p tcp --dport 1521 -j ACCEPT
-A RH-Firewall-1-INPUT -m state --state NEW -m tcp -p tcp --dport 22 -j ACCEPT
"/etc/sysconfig/iptables" 25L, 1275C
# Firewall configuration written by system-config-securitylevel
# Manual customization of this file is not recommended.
*filter
:INPUT ACCEPT [0:0]
:FORWARD ACCEPT [0:0]
:OUTPUT ACCEPT [0:0]
:RH-Firewall-1-INPUT - [0:0]
-A INPUT -j RH-Firewall-1-INPUT
-A FORWARD -j RH-Firewall-1-INPUT
-A RH-Firewall-1-INPUT -i lo -j ACCEPT
-A RH-Firewall-1-INPUT -p icmp --icmp-type any -j ACCEPT
-A RH-Firewall-1-INPUT -p 50 -j ACCEPT
-A RH-Firewall-1-INPUT -p 51 -j ACCEPT
-A RH-Firewall-1-INPUT -p tcp -m state --state NEW -m tcp --dport 8080 -j ACCEPT
-A RH-Firewall-1-INPUT -p tcp -m state --state NEW -m tcp --dport 1158 -j ACCEPT
-A RH-Firewall-1-INPUT -p tcp -m state --state NEW -m tcp --dport 5560 -j ACCEPT
-A RH-Firewall-1-INPUT -p udp --dport 5353 -d 224.0.0.251 -j ACCEPT
-A RH-Firewall-1-INPUT -p udp -m udp --dport 631 -j ACCEPT
-A RH-Firewall-1-INPUT -p tcp -m tcp --dport 631 -j ACCEPT
-A RH-Firewall-1-INPUT -m state --state ESTABLISHED,RELATED -j ACCEPT
-A RH-Firewall-1-INPUT -m state --state NEW -m tcp -p tcp --dport 3306 -j ACCEPT
-A RH-Firewall-1-INPUT -m state --state NEW -m tcp -p tcp --dport 1521 -j ACCEPT
-A RH-Firewall-1-INPUT -m state --state NEW -m tcp -p tcp --dport 22 -j ACCEPT
-A RH-Firewall-1-INPUT -j REJECT --reject-with icmp-host-prohibited
COMMIT
~
~
~
~
~
~
~
~
~
~
~
~
~
"/etc/sysconfig/iptables" 25L, 1275C written

--停止防火墙服务
[root@hqw ~]# service iptables stop
Flushing firewall rules: [ OK ]
Setting chains to policy ACCEPT: filter [ OK ]
Unloading iptables modules: [ OK ]

--开启防火墙服务
[root@hqw ~]# service iptables start
Applying iptables firewall rules: [ OK ]
Loading additional iptables modules: ip_conntrack_netbios_n[ OK ]
[root@hqw ~]#


--查看网络配置

[root@hqw ~]# ifconfig
eth0 Link encap:Ethernet HWaddr 00:0C:29:0D:B0:9D
inet addr:192.168.11.6 Bcast:192.168.11.255 Mask:255.255.255.0
inet6 addr: fe80::20c:29ff:fe0d:b09d/64 Scope:Link
UP BROADCAST RUNNING MULTICAST MTU:1500 Metric:1
RX packets:121089 errors:0 dropped:0 overruns:0 frame:0
TX packets:65139 errors:0 dropped:0 overruns:0 carrier:0
collisions:0 txqueuelen:1000
RX bytes:169113515 (161.2 MiB) TX bytes:5457976 (5.2 MiB)
Interrupt:67 Base address:0x2000

lo Link encap:Local Loopback
inet addr:127.0.0.1 Mask:255.0.0.0
inet6 addr: ::1/128 Scope:Host
UP LOOPBACK RUNNING MTU:16436 Metric:1
RX packets:7086 errors:0 dropped:0 overruns:0 frame:0
TX packets:7086 errors:0 dropped:0 overruns:0 carrier:0
collisions:0 txqueuelen:0
RX bytes:4800365 (4.5 MiB) TX bytes:4800365 (4.5 MiB)


--远程连接
|
自学PHP网专注网站建设学习,PHP程序学习,平面设计学习,以及操作系统学习
京ICP备14009008号-1@版权所有www.zixuephp.com
网站声明:本站所有视频,教程都由网友上传,站长收集和分享给大家学习使用,如由牵扯版权问题请联系站长邮箱904561283@qq.com